Thomas Tiemann

To apply a nasal strip correctly, place it across the lower part of your nose bridge - not the bony top - press both adhesive arms firmly down, and smooth from the center outward. Dry, clean skin is the single biggest factor in whether it stays on all night. Get those two things right and everything else follows.
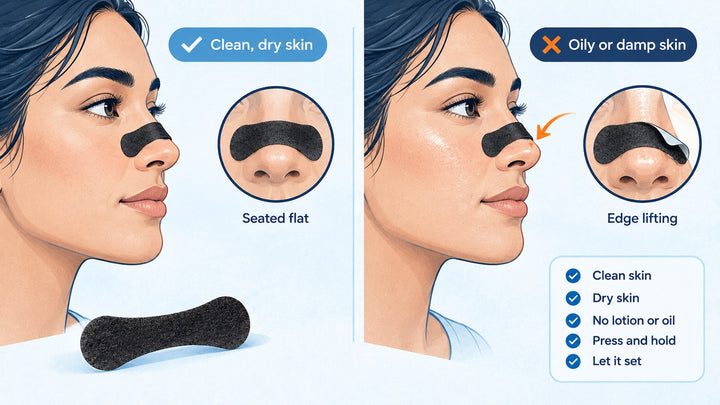
- Wash and thoroughly dry your nose before applying - oils and moisture are the main reason strips fall off.
- Position the strip on the fleshier lower bridge, not across the bony top or tip.
- Press the center tab first, then smooth both arms downward and outward.
- Hold each section firmly for a few seconds to activate the adhesive.
- Remove slowly with warm water or a gentle press-and-peel motion to avoid skin irritation.
- For a deeper look at the mechanics behind the lift, see how nasal strips work and why the design matters.
How Nasal Strips Work - the Quick Version
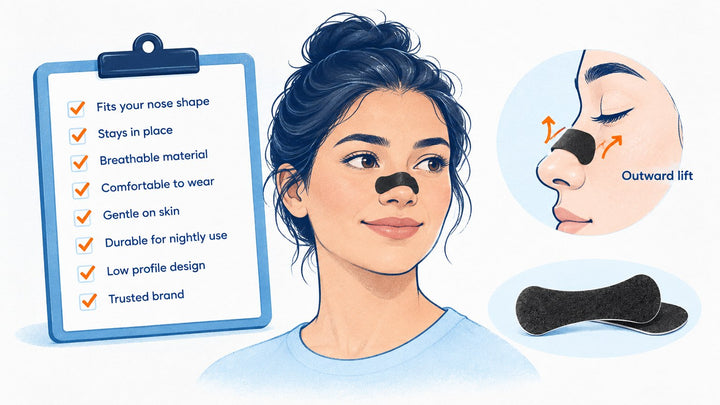
A nasal strip is a spring-like adhesive band that bonds to the outside of your nose. When it tries to return to its flat shape, it gently lifts the nasal sidewalls outward, widening the airway opening. That mechanical action - no drugs, no sprays - is why placement matters: the strip can only lift what it's directly attached to.
Understanding where the lift is generated helps you position the strip in the right zone every time. For the full explanation of the anatomy involved and why design differences between strips produce different results, read the complete guide to how nasal strips work and why the design matters.
What You Need Before You Apply
Preparation takes about thirty seconds and makes the difference between a strip that lasts all night and one that slides off by 2 a.m.
Clean and dry skin
Wash the skin over your nose with a gentle face wash or plain soap and rinse thoroughly. Pat completely dry - not just damp-dry. Any residual moisture, natural skin oil, or face cream sitting on the surface will prevent the adhesive from bonding fully. If you apply moisturizer or sunscreen as part of your routine, apply the nasal strip first, then work around it, or wait until after you remove the strip in the morning.
Timing and surface conditions
Apply the strip just before you get into bed, not during a workout warm-up or after a shower when your skin is still slightly warm and moist. If you have naturally oily skin, a quick swipe with an oil-free toner or an alcohol-free cleansing pad on the nose area alone can improve adhesion noticeably. Avoid touching the adhesive side of the strip with your fingers before it contacts your skin.
How to Put on a Nasal Strip - Step by Step
- Wash and dry your nose. Use a gentle cleanser on the bridge and sides of your nose. Rinse well and pat completely dry with a clean towel. Give it a full minute before moving on - rushing this step is the most common reason strips fail overnight.
- Peel the protective backing. Hold the strip by its edges and peel away the paper or film liner, taking care not to press your fingertips onto the exposed adhesive surface. Set the liner aside.
- Locate the correct placement zone. Look in a mirror. You want the fleshy lower portion of your nose bridge - roughly the area between the tip and the bony upper bridge. The strip should sit symmetrically, with equal amounts of adhesive on each side of center. See the placement section below for more detail.
- Press the center tab first. Touch the midpoint of the strip to the center of your nose and press down firmly for two to three seconds. This anchors the strip before you deal with the arms, so it doesn't shift as you smooth outward.
- Smooth both arms downward and outward. Using two fingers on each side, press each adhesive arm from the center toward the outer edge, following the natural curve of your nose. Apply firm, even pressure along the full length of each arm. You should feel the strip sitting flush against the skin with no lifted edges.
- Final press - hold for five seconds. Run your fingertips over the entire strip once more, pressing firmly. This final pass activates the adhesive fully and catches any sections that may not have bonded on the first smooth.
That's it. The strip should feel snug but not tight, and you should notice a subtle sensation of the nostrils being gently drawn open - that's the spring action doing its job.
Nasal Strip Placement: Finding the Right Spot
Placement is the step most people get wrong, and it directly affects how well the strip opens your airway. The target zone is the lower nose bridge - the slightly fleshier region where the cartilage begins, roughly halfway between the tip of your nose and the hard bony bridge between your eyes.
A strip placed too high (on the bony bridge) won't flex effectively because bone doesn't give. A strip placed too low (toward the tip) may not engage the nasal sidewalls where the airway narrowing actually occurs. Centered left-to-right is equally important: if the strip sits off to one side, one nostril gets more lift than the other.
| Zone | What happens |
|---|---|
| Too high - bony bridge | Strip can't flex; little or no lift generated |
| Correct - lower cartilage zone | Spring action lifts nasal sidewalls outward; maximum airway opening |
| Too low - toward tip | Adhesive may not reach sidewalls; lift is reduced or misdirected |
| Off-center (left or right) | Uneven lift; one nostril opens more than the other |
How Long Can You Wear a Strip?
Most nasal strips are designed for a single overnight session - typically up to eight hours. Wearing one longer than intended doesn't improve the lift and can make removal harder on your skin. For a full breakdown of wear limits, what happens if you leave one on during the day as well as at night, and how different activities affect duration, see the complete guide to how long you can wear a nasal strip.
If Your Strip Won't Stay Put
If your strip is peeling off overnight, skin prep is almost always the cause - residual oil, moisture from a pre-bed shower, or a moisturizer applied too recently. Beyond prep, strip size relative to your nose can also affect contact area and adhesion. There are several targeted fixes worth knowing before you conclude that strips simply don't work for you. The full troubleshooting guide covers skin type, humidity, application technique adjustments, and when a different strip format might suit you better - read the complete guide to nasal strips not sticking.

How to Remove a Nasal Strip Without Irritation

Removing a strip slowly and gently matters as much as applying it well, especially if you plan to use one every night. The right approach is a press-and-peel: use one finger to press the skin down alongside one edge of the strip while you lift the opposite edge away at a low angle, moving gradually toward the center. Warm water loosens the adhesive and makes the process noticeably easier, particularly for sensitive skin.
Never yank a strip straight off - that's the fastest route to redness or irritation. For the full removal guide, including advice on sensitive skin, stubborn adhesive, and what to do if some residue remains, see how to remove nasal strips without irritating your skin.
Nelamant Air - Designed for a Secure Fit
If you've had trouble with strips that feel like they're pulling from a single point or that lift off at the edges before morning, the strip's design is worth looking at. Nelamant Air uses a wider band that distributes the lift more evenly across the bridge rather than concentrating tension at one spot. The extra-hold adhesive is formulated to resist sweat, skin oil, and overnight movement, and the hypoallergenic materials peel away cleanly without leaving sticky residue - so the removal step described above is as straightforward as it should be.
For answers to common questions about fit, wear time, and whether Nelamant Air suits your skin type, visit the Nelamant Air FAQ page.
Frequently Asked Questions
Where exactly should a nasal strip be placed on the nose?
Center it on the lower nose bridge - the slightly soft zone where cartilage begins, about halfway between the tip of your nose and the hard bony bridge near your eyes. The strip should sit symmetrically, with equal adhesive contact on both sides. Avoid the bony upper bridge (too high) and the tip (too low).
Can I apply a nasal strip over moisturizer or sunscreen?
No. Any product on the skin surface - moisturizer, sunscreen, serum, or face oil - will prevent the adhesive from bonding to your skin directly. Apply the strip to clean, dry skin before any topical products, or skip products on that area of your nose until after the strip is removed in the morning.
How do I know if the nasal strip is on correctly?
Once applied, you should notice a gentle widening sensation in your nostrils - the strip pulling slightly outward as the spring action engages. All edges should lie flat with no lifting corners. Looking in a mirror, the strip should sit symmetrically across the lower bridge with equal amounts on each side of the center line.
What's the best way to apply a nasal strip so it doesn't peel off overnight?
Thorough skin prep is the most reliable fix. Wash the nose area, dry it completely, and wait a minute before applying. Press firmly from center outward and hold each section for a few seconds. If you have oily skin, a quick swipe with an oil-free toner on just the nose area before application helps considerably. For more specific troubleshooting, see why nasal strips stop sticking and how to fix it.
Can I apply a nasal strip right after a shower?
It's better to wait ten to fifteen minutes after a shower so your skin cools down and any residual surface moisture fully evaporates. Warm, slightly damp post-shower skin reduces adhesive contact significantly.
One Last Thing
Knowing how to apply nasal strips correctly takes about thirty seconds to learn and pays off every single night. Clean skin, correct placement on the lower bridge, and a firm center-first press are the three things that matter most. Get those right and the strip does the rest - gently holding your nasal passages open through the night without any drugs involved.
If you want to understand the mechanics behind why that lift works the way it does, the full explanation is in the guide to how nasal strips work and why the design matters.